 4iiii PRECISION 3+ PRO Shimano DURA-ACE 9200 Dual-Sided Power Meter
  Quarq SRAM XX1 Eagle DUB Power Meter Crankset
  Favero Assioma DUO Power Meter Pedals
 When it comes to power meters, a cyclists’ first concern is usually accuracy – and rightly so. After all, what’s the point of measuring power if the data isn’t true and reliable? Most of what makes a power meter accurate is outside of our control. How it was designed, engineered and assembled all contribute to a power meter’s accuracy. However, there is one thing every cyclist can do to aid in the accuracy of their power meter. It’s easy and only takes a few seconds. Perform regular zero-offsets. For most power meters, they should be performed before every ride. This article aims to address what zero-offsetting is, why it’s important and how to zero your power meter depending on which one you have.

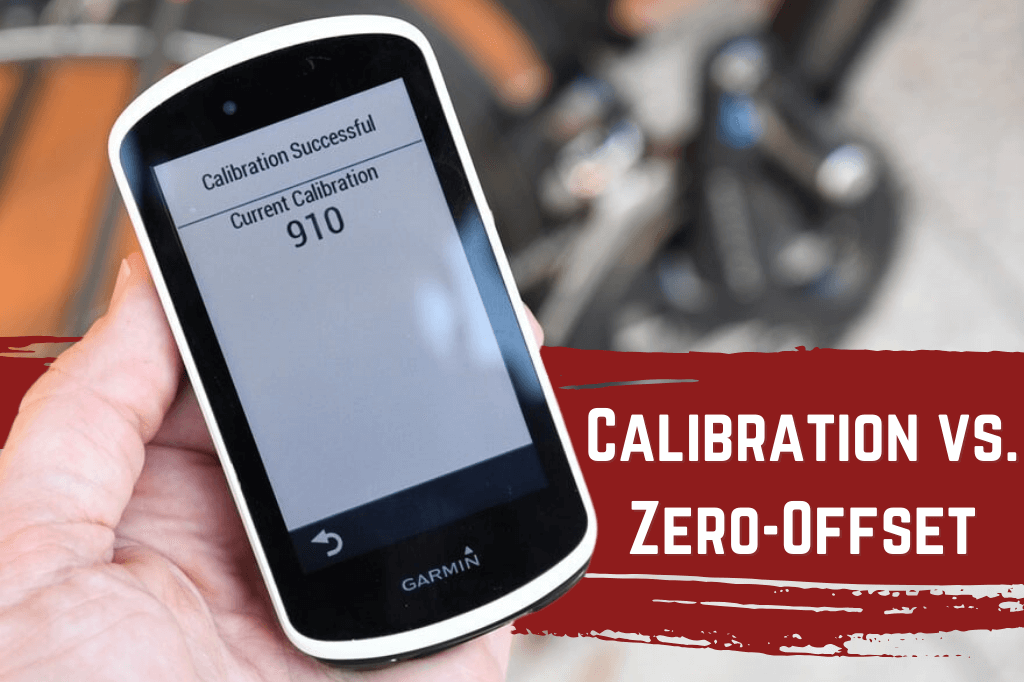
Calibration and Zero-Offset
While the terms calibration and zero-offset are often used interchangeably, they are in fact two separate, distinct procedures. Calibration refers to a one-time procedure the manufacturer performs when your power meter is assembled. Specifically, the manufacturer sets the ‘slope’ of your power meter. Your power meter uses the slope to determine the correct wattage output when you ride.
Zero-offsetting or zeroing, is a procedure that is performed by the cyclist before every ride. When you do a zero-offset, the power meter zeros out any residual torque that has built up in the power meter from previous rides, temperature changes or installations. In essence, zeroing wipes the power meter clean. Think of zeroing as setting the tare on a scale. You wouldn’t step on a scale if it was reading 10 lbs. with nothing on it. Nor should you just hop on your bike and ride without performing a quick zero-offset.
General Zero Procedures
While the steps taken to zero each power meter vary slightly, the general process is the same.
- When you perform a zero, you should be off of the bike and the pedals should be completely unweighted. In addition, the bike should be perfectly vertical
- On your bicycle computer or app, navigate to the calibration page and select Calibrate. (Again, you’re really zero-offsetting but most bicycle computers and apps call it Calibrate)
- Most computers and apps will then display some type of “Calibration Successful” message
- Depending on the power meter, the computer might also display the zero offset value
Also, here are two helpful tips to keep in mind if you run into issues when zeroing your power meter:
- Be sure you have the latest version of firmware installed on both your head unit and power meter. This can help avoid issues during the calibration process
- If you have any ANT+ compatible devices paired with your head unit that aren’t currently in use (heart rate monitor, speed/cadence sensor, etc.), you can try disabling them on your head unit. Sometimes, the head unit will continue to search for these before proceeding to the calibration procedure
One Last Note…Auto Zero
As you will see below, some power meters have a feature called Auto Zero. With this feature, the power meter will perform an automatic calibration on its own – usually when the bike is stationary or while coasting. It’s really a handy feature. While it is still possible to perform a zero using the head unit, it really is not necessary. Just get on your bike and ride.
How to Zero Your Power Meter: Steps for Each Power Meter
Based on which power meter you have, please find the corresponding steps below which will outline how to zero your power meter correctly.

4iiii Zero-Offset Steps
When:
Before every ride.
Steps:
- Spin the cranks backwards a few times to wake up the power meter
- Align the crank arms vertically with the left arm in the 6 o’clock position
- On your bicycle computer or 4iiii app, navigate to the calibration page and select Calibrate
- You should see the two digit code “10” and a “Calibration Successful” message
Favero Assioma Zero-Offset Steps
When:
After installing your power meter for the first time and when you move the power meter between bikes. Other than these times, there is no need to manually zero as the Favero Assioma power meters have Auto Zero and the power meter will perform calibrations automatically.
Steps:
- Spin the cranks backwards a few times to wake up the power meter
- Align the crank arms vertically (at 6 and 12 o’clock)
- On your bicycle computer or Favero app, navigate to the calibration page and select Calibrate
- You should receive a message saying “Calibration Successful 0” (It’s important the value is 0. If not, repeat the calibration procedure again)
FSA Zero-Offset Steps
When:
Never.
The PowerBox has Auto Zero and will automatically zero-offset every time you coast for at least two seconds during a ride. Therefore, while it is still possible to perform a zero using the head unit, it really is not necessary. Just get on your bike and ride, the PowerBox will do the rest.

Garmin Zero-Offset Steps
When:
Before every ride.
Steps:
- Spin the cranks backwards a few times to wake up the power meter
- Position the cranks in a horizontal position (3 and 9 o’clock)
- On your bicycle computer or Garmin Connect app, navigate to the calibration page and select Calibrate
- You should receive a message saying “Calibration Successful”
Important Note:
The Vector 3 comes with an auto-zero function. Auto-zero can be enabled or disabled using your bicycle computer. When enabled, the Vector pedals will auto-zero every time they are woken up. The pedals will also do an auto-zero immediately before going to sleep (four minutes after the last movement). Note that in order for auto-zero to succeed, the pedals must be stationary for approximately 10 seconds and the bike must be upright.
Even with auto-zero enabled, you can still perform a manual zero at any time (the steps outlined above). In fact, upon installing the pedals for the first time or moving them between bikes, it is recommended you perform a manual zero in order to get the offset values into a range where the auto-zero can track any further changes.
LOOK Zero-Offset Steps
When:
Before every ride.
Steps:
- Spin the cranks backwards a few times to wake up the power meter
- Position the cranks in a horizontal position (3 and 9 o’clock)
- On your bicycle computer or EXAKT Power app, navigate to the calibration page and select Calibrate
- You should receive a message saying “Calibration Successful” followed by the offset value
power2max Zero-Offset Steps
When:
Never.
power2max units have Auto Zero and they will perform an automatic zero-offset every time you coast for at least three seconds during a ride. Therefore, while it is still possible to perform a zero using the head unit, it really is not necessary. Just get on your bike and ride, the power2max will do the rest.

PowerTap P2 Pedal Zero-Offset Steps
When:
Before every ride.
Steps:
- Spin the cranks backwards a few times to wake up the power meter
- On your bicycle computer or PowerTap Mobile app, navigate to the calibration page and select Calibrate
- You should receive a message saying “Calibration Successful”. The head unit might also include a number in the calibration successful message like 5 or 20. This number refers to the zero offset value and isn’t something you need to worry much about
Quarq Zero-Offset Steps
When:
Never.
Quarq power meters have a feature called MagicZero. With MagicZero, the power meter automatically calibrates as you ride. Typically, this automatic calibration will occur when the bike is stationary, coasting, or when you are slowly backpedaling. Therefore, there is no need for manual offsets.
ROTOR 2INpower/INpower DM Zero-Offset Steps
When:
The 2INpower and INpower DM power meters do not need to be zero’d before every ride. However, you should perform a zero-offset after the initial installation or after changing any drivetrain components (pedals, chainrings, etc.). It is also recommended that you perform a zero-offset after 30 hours of riding.
Steps:
- Spin the cranks backwards a few times to wake up the power meter. (Note that with some head units, you need to apply a load to the crank and pedal a few times before entering the calibration menu)
- Align the crank arms vertically with the left arm in the 6 o’clock position
- On your bicycle computer or ROTOR Power app, navigate to the calibration page and select Calibrate
- You should receive a message saying “Calibration Successful 1000”
- Slowly turn the crank counterclockwise two or three turns and align the crank arms vertically again with the left arm in the 6 o’clock position and right arm in the 12 o’clock position
- Calibrate once again and record the offset value shown
- You can repeat the process if necessary to ensure numbers are in the same range (+/-200)

SRM Zero-Offset Steps
When:
Before every ride.
Steps:
- Spin the cranks backwards a few times to wake up the power meter
- On your bicycle computer, navigate to the calibration page and select Calibrate
- You should receive a message saying “Calibration Successful”. The head unit will also include a number in the calibration successful message which corresponds to your zero offset value. With SRM power meters, you typically want to see a value of between 400-600.
Please note that zero offset values above or below the 400-600 range DO NOT necessarily signal that something is wrong with the power meter. What’s most important is that the number is stable, day-to-day, give or take 5. So for example, 350 one day and 355 the next is fine. However, 350 one day and 370 the next is not. When paired with an SRM power meter, most bike computers also show the previously stored zero-offset value which is a handy way to confirm your value is staying consistent.
Stages Cycling Zero-Offset Steps
When:
Before every ride.
Steps:
- Spin the cranks backwards a few times to wake up the power meter
- Align the crank arms vertically with the left arm in the 6 o’clock position
- On your bicycle computer, navigate to the calibration page and select Calibrate
- You should receive a message saying “Calibration Successful”. The head unit will also include a number in the calibration successful message which corresponds to your zero offset value. You want to see a value of between 840-940.
Please note that zero offset values above or below the 840-940 range DO usually signal that something is wrong with the power meter. In addition, while the absolute value of the zero offset number is not something you need to worry about (for example, 855 vs 920), you should make sure it doesn’t change drastically from one calibration to another. For example, 850 one day and 900 the next is a problem.
You can also perform a zero-offset using the StagesPower app on your mobile device.
- Spin the cranks backwards a few times to wake up the power meter
- Align the crank arms vertically with the left arm in the 6 o’clock position
- Open up the StagesPower app on your mobile device and select “Connect via Bluetooth” on the iOS app or select the power meter from the list of Discoverable devices on the Android App
- Select “Zero Reset” from the app. A zero reset value will appear under “ADC” once the process is complete
Velocomp Zero-Offset Steps
When:
The first time you ride outdoors only. If you set up additional bike profiles, a one-time calibration ride will be needed for each additional bike as well.
Steps:
- With the light on the PowerPod yellow, press the button on the top of the PowerPod
- You then perform a 5-minute ride during which point the PowerPod will calibrate. Ideally, aim for a steady ride with minimal stops or interruptions
- During the ride, the light will flash yellow, indicating that the calibration procedure is in progress. You will also see the watts on your head unit increase from 1 to 100. (The number indicates the % complete. So at 50 for example, your head unit is saying the calibration procedure is 50% complete.)
- After 5 minutes, you should reach 100, at which point the calibration process is complete and your actual power will begin to show
- Click the button on the PowerPod again
- The light should flash green
- Begin pedaling and the light should turn solid green

Verve InfoCrank Zero-Offset Steps
When:
Never.
The InfoCrank does not need to be zero’d. The reason for zeroing a power meter is to zero or cancel out any residual torque that has built up in the power meter from previous rides, temperature changes or installations. The InfoCrank was constructed and designed so that torque never accumulates in the strain gauges. The InfoCrank reads true and accurate 100% of the time – no zeroing necessary. It is a ‘get on and go’ power meter. We do recommend performing a zero in the event of a crash however, as an impact to the crankset can mess with your offset values.
Steps:
- Align the crank arms vertically (at 6 and 12 o’clock)
- Place the chain on the smallest chainring
- On your bicycle computer, navigate to the calibration page and select Calibrate
- You should receive a message saying “Calibration Successful 0”
- Repeat the process as necessary until the calibration reading goes to 0


I assume Quarq is more or less the same, but don’t see it listed.
Hi Tom. The article is updated now for Quarq! Thank you
Super helpful.
I had searched quite a bit to find these instructions. Much clearer than the manufacturer’s.
Thank you!
Hi Alana. Thank you for this! We are happy to help you if there is anything else we can do. Ride safe!